Set up your Jezweb email on Android
The screenshots below are from an earlier software version — buttons may look a little different on your device, but the steps and settings are current.
This guide adds your Jezweb-hosted email address to Android using the Gmail app. You’ll need the email address and password we sent you — if you can’t find them, email us and we’ll resend them securely.
Your settings
These are the only details you’ll type — everything else is just finding the right screen.
| Setting | Value |
|---|---|
| Incoming server (IMAP) | ax.email |
| Incoming port | 993 (SSL) |
| Outgoing server (SMTP) | ax.email |
| Outgoing port | 465 (SSL) |
| Username | your full email address |
| Password | your email password |
The steps
-
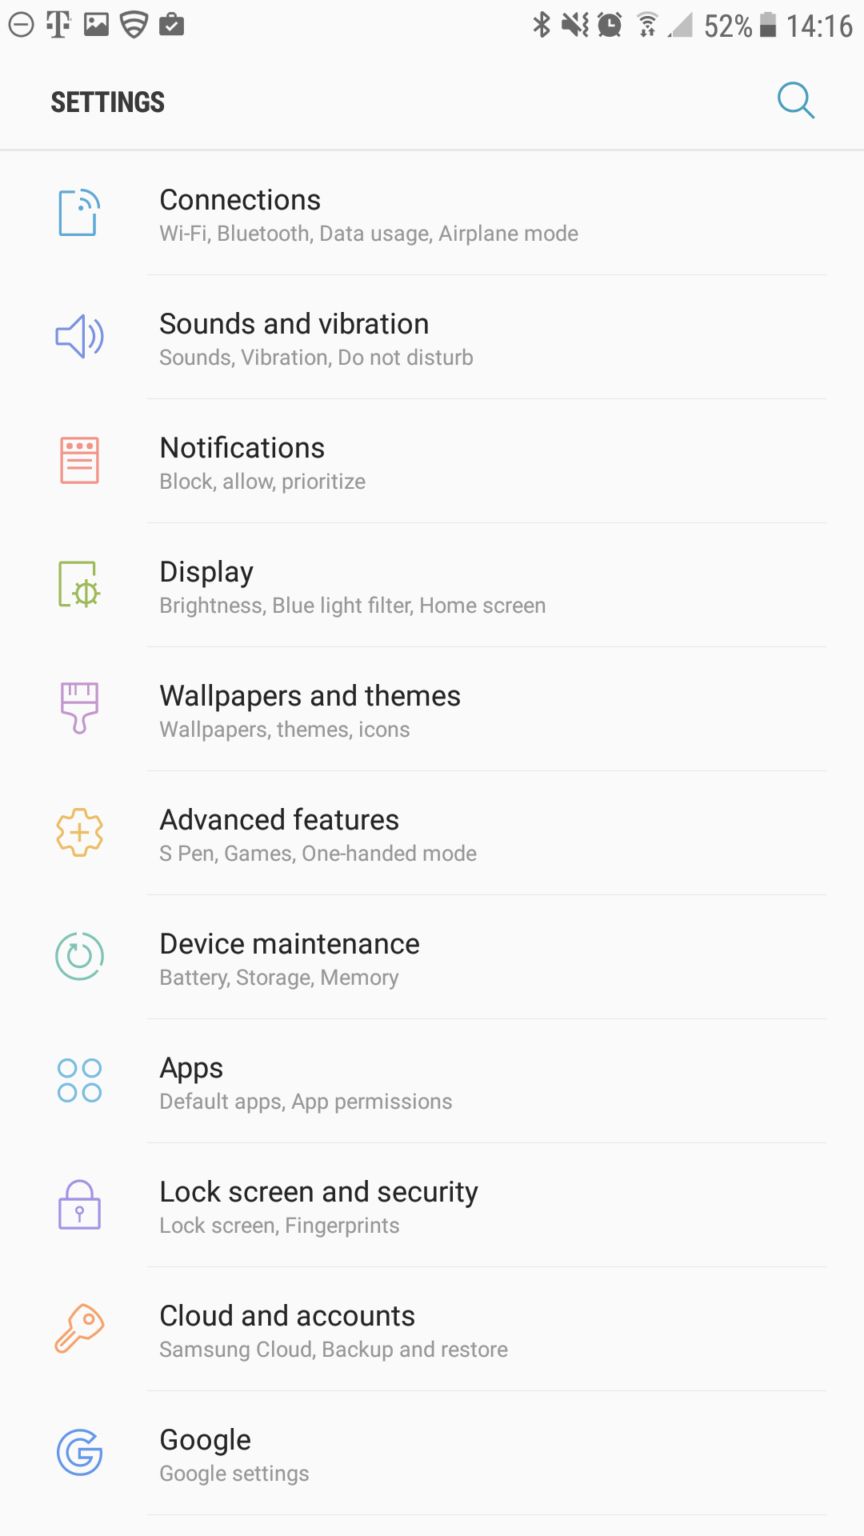
Open Settings on your device, then tap Cloud and Accounts.
-
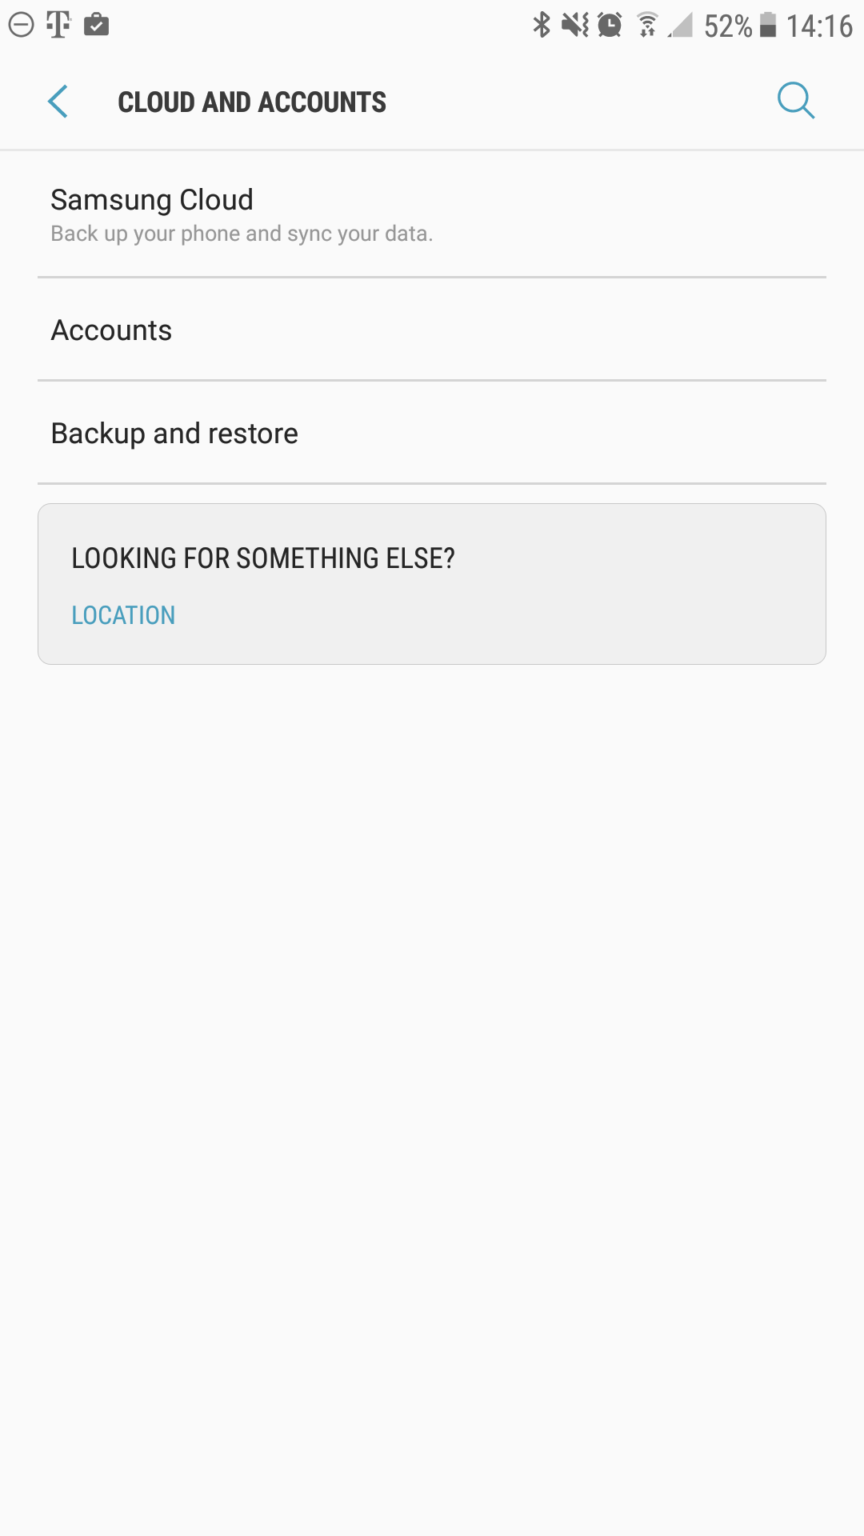
Tap Accounts.
-
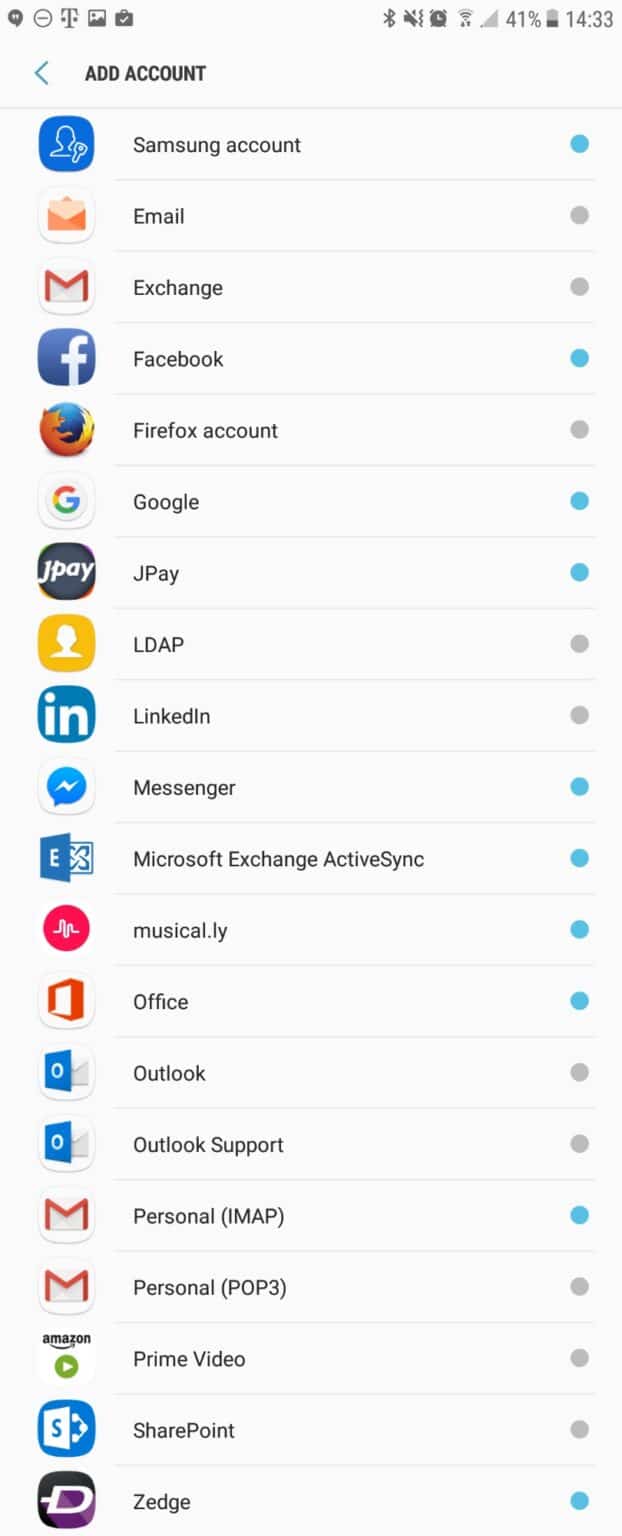
Tap Add Account, then choose Personal (IMAP) near the bottom of the screen.
-
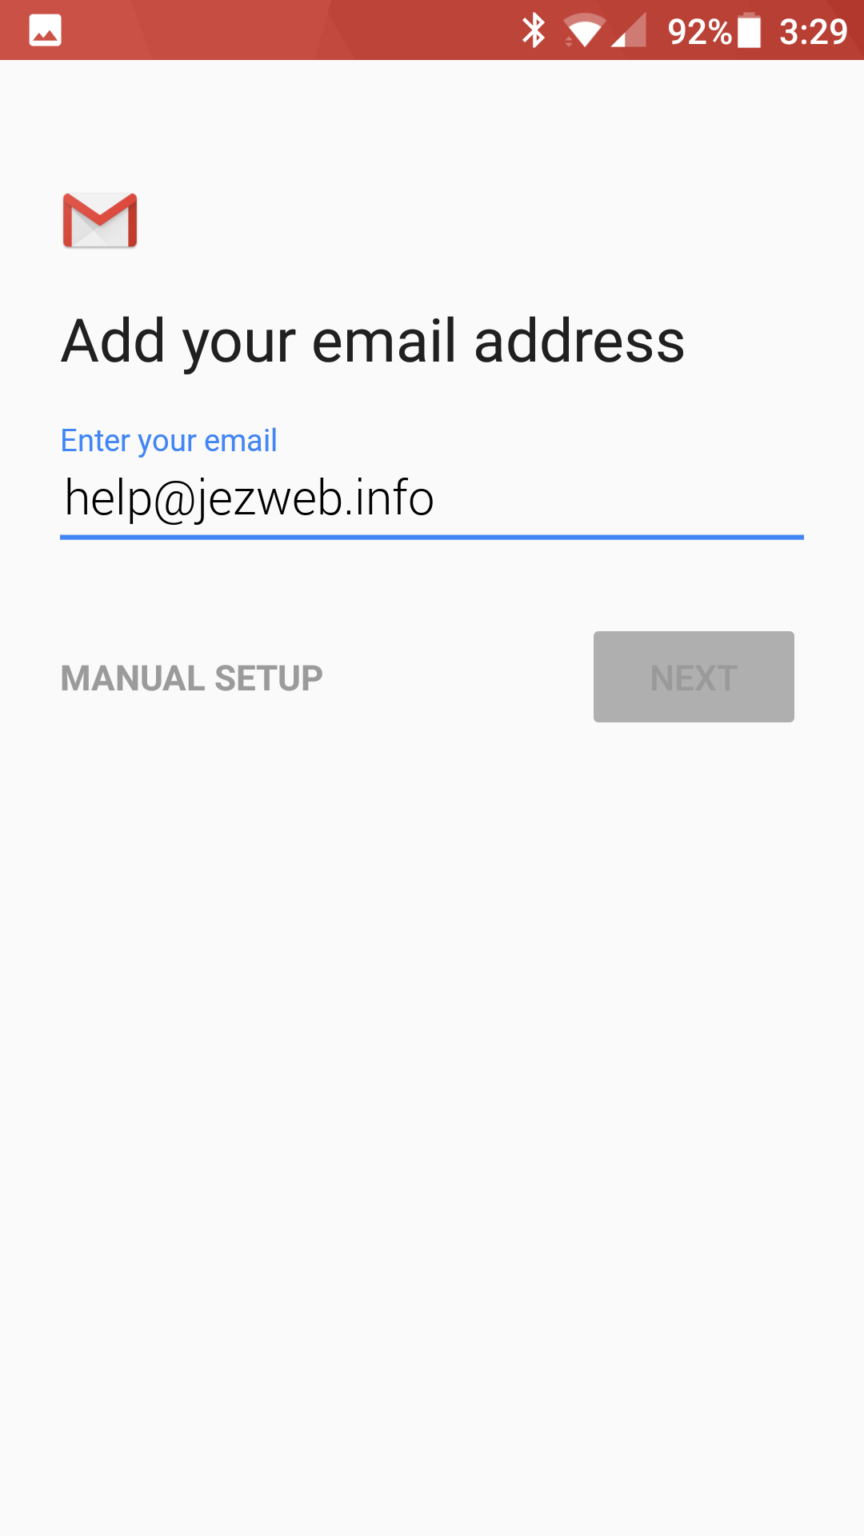
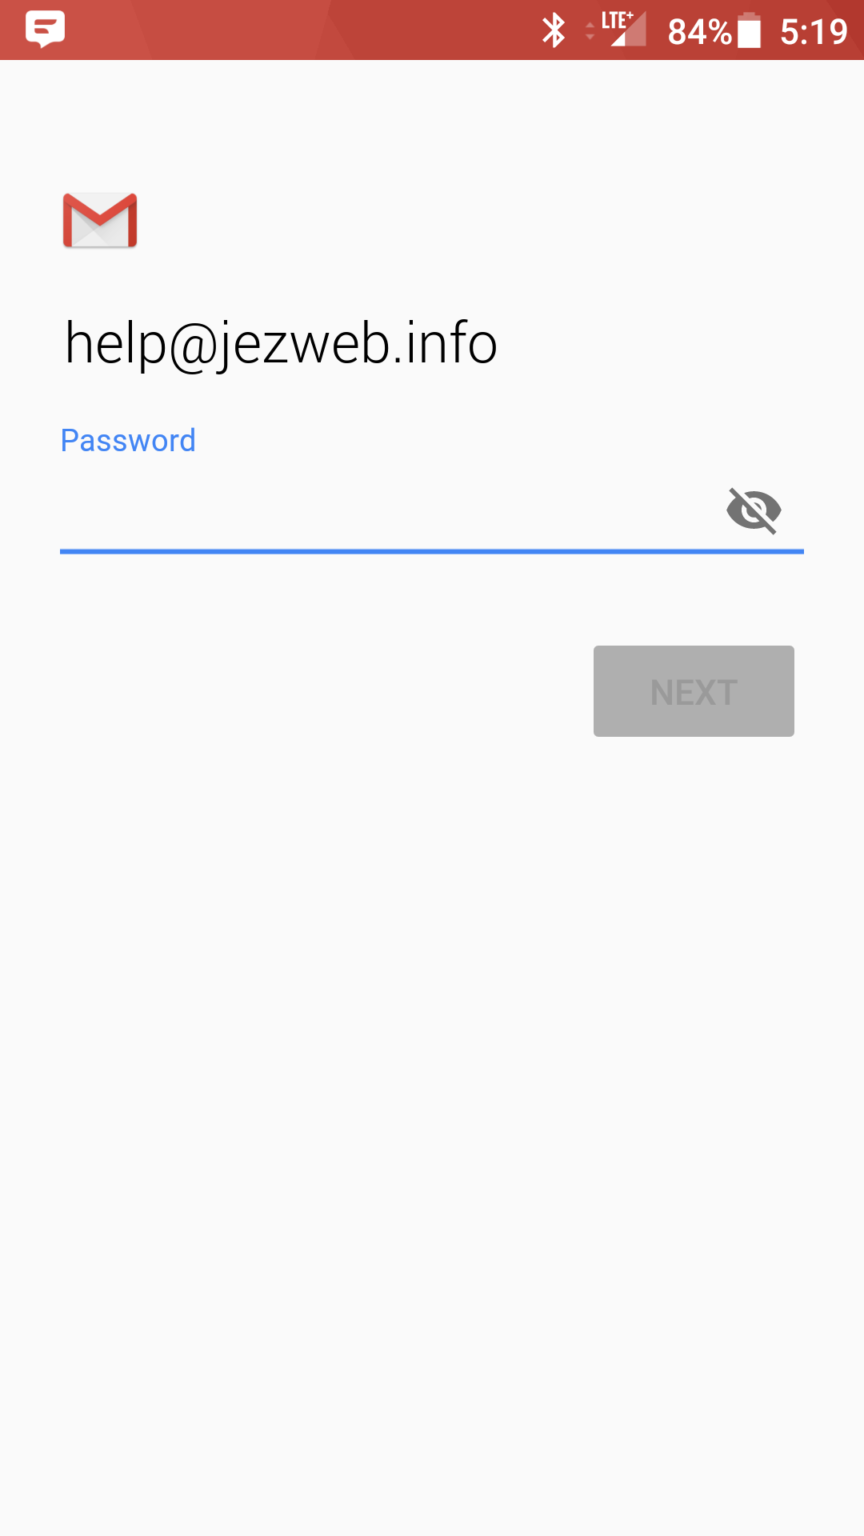
Enter your full email address and tap Next.
-
Enter your email password and tap Next.
-
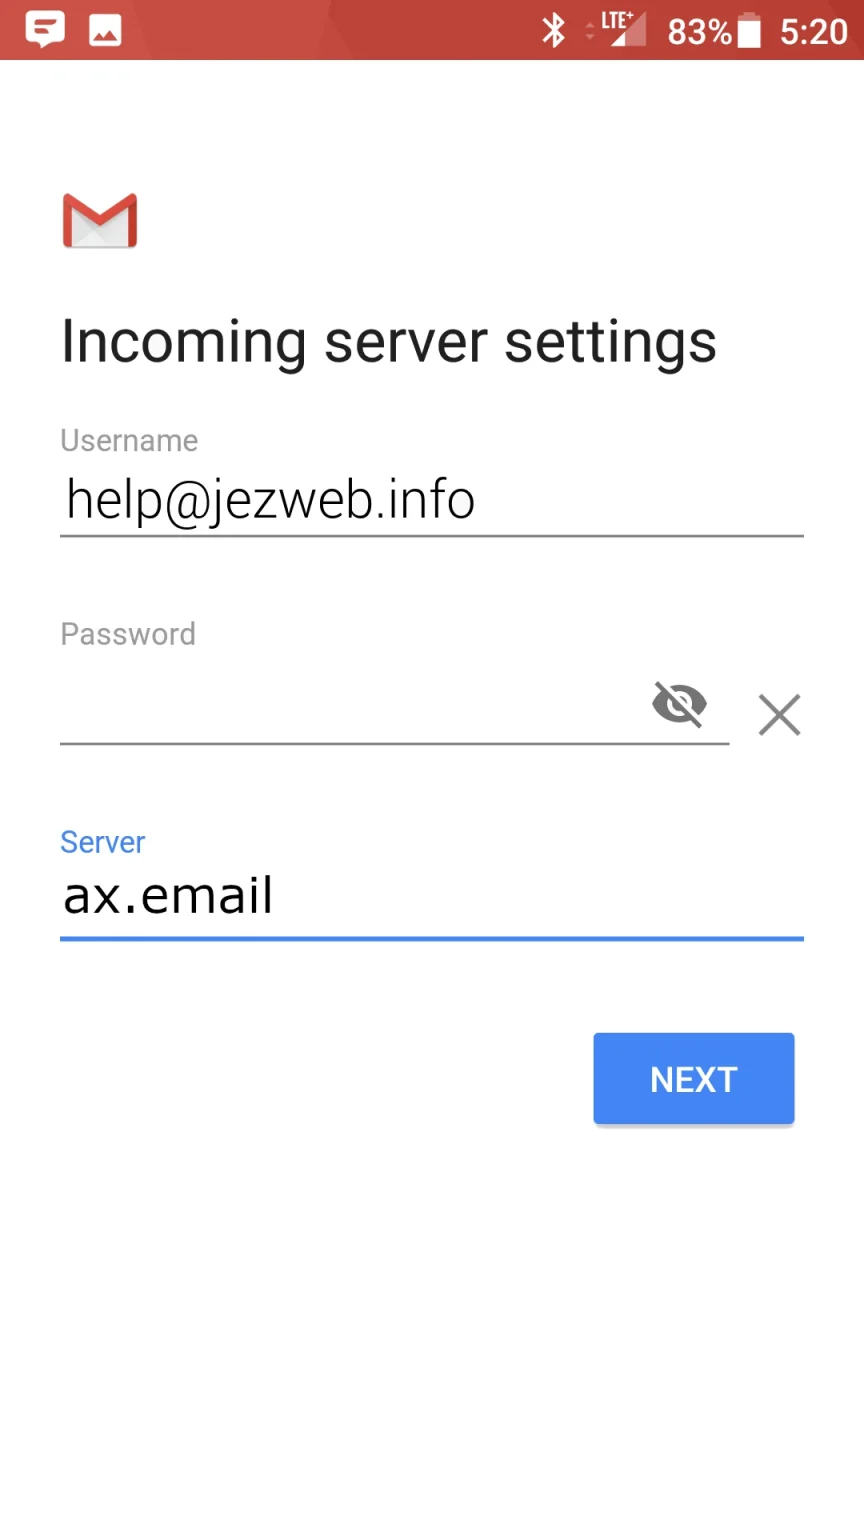
For Incoming server settings, enter:
- Username: your full email address
- Password: your email password
- Server:
ax.email
Tap Next.
-
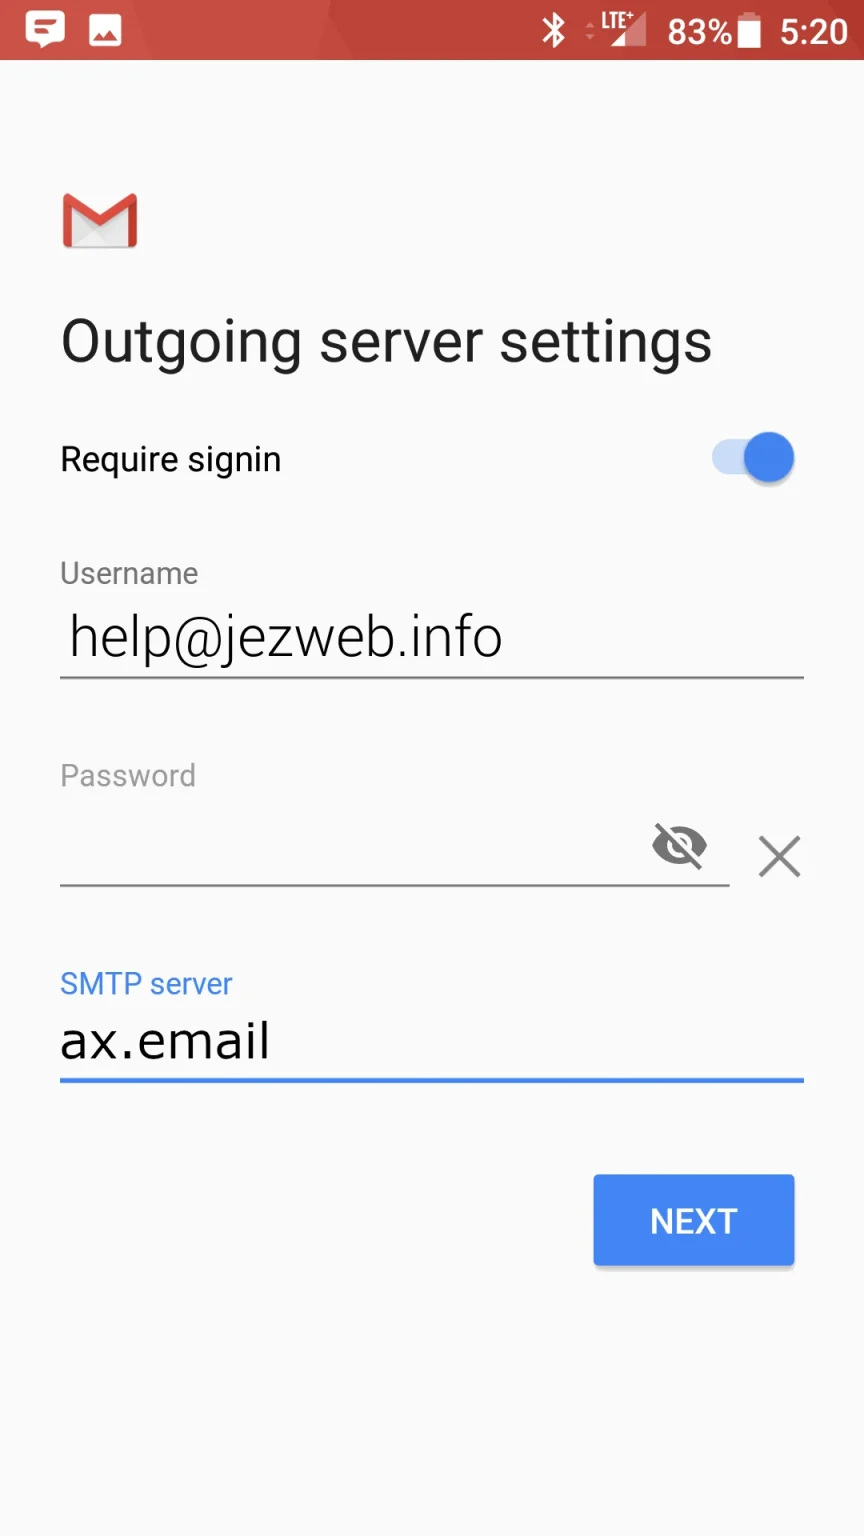
For Outgoing server settings, make sure Require sign-in is enabled, then enter:
- Username: your full email address
- Password: your email password
- SMTP server:
ax.email
Tap Next.
-
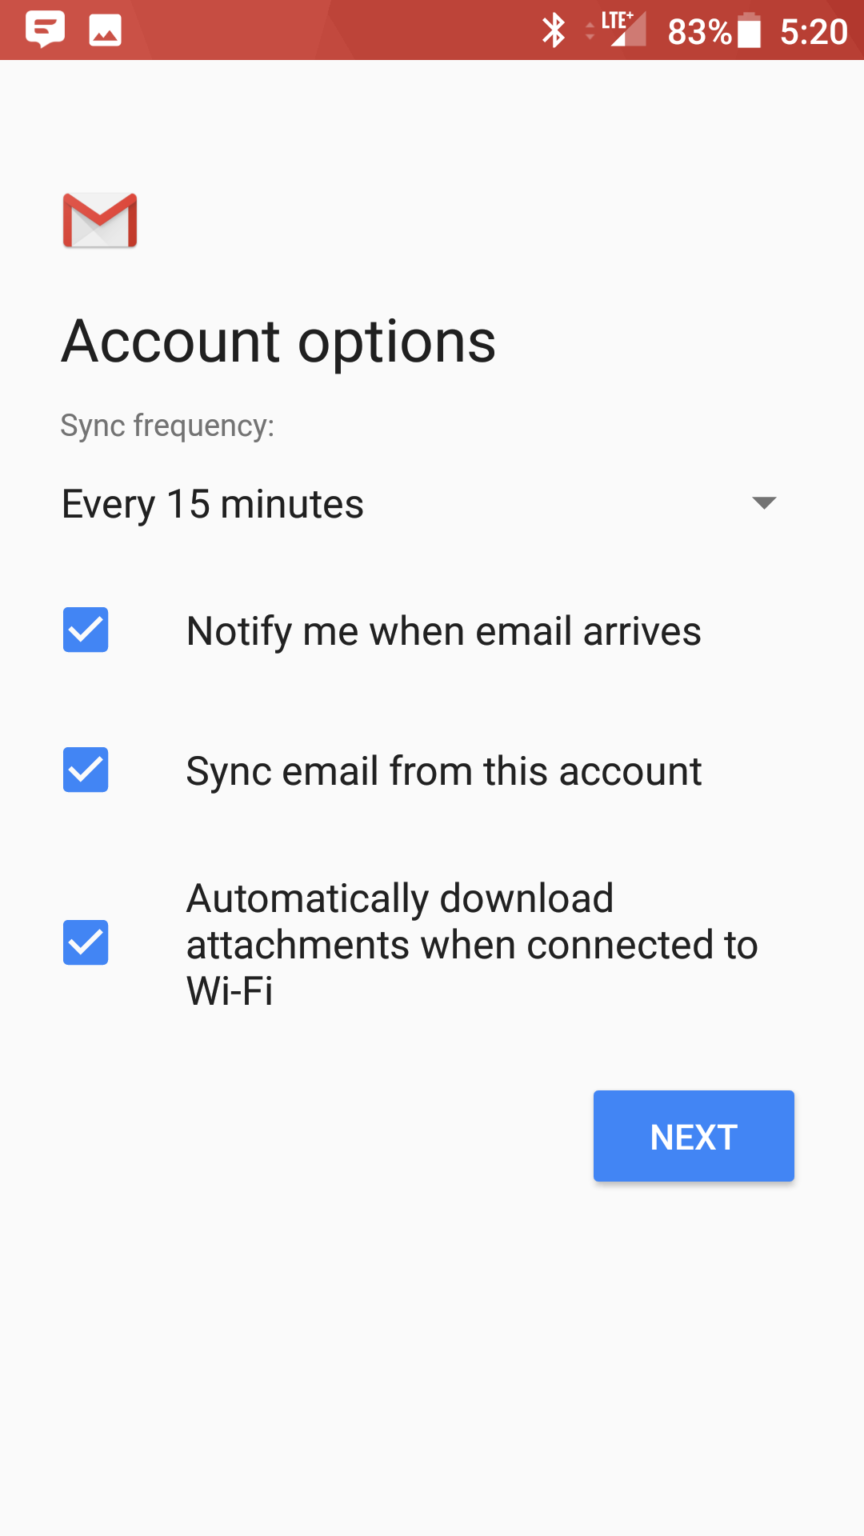
Choose your sync preferences and tap Next.
-
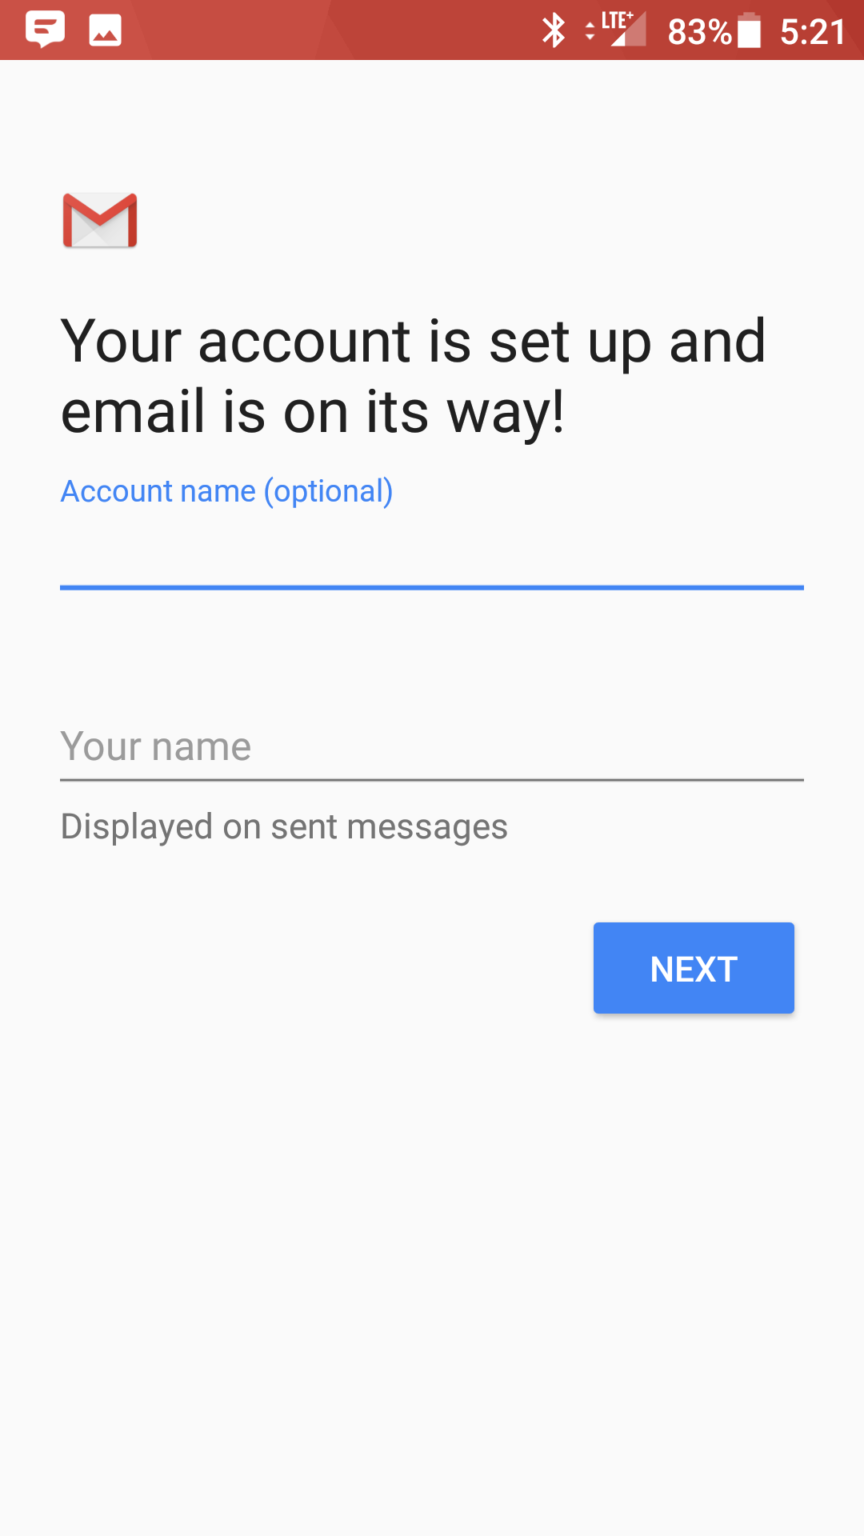
Give the account a name (anything that helps you tell it apart from other accounts) and enter your display name for outgoing messages. Tap Next.
-
You’re done. Open the Gmail app and your messages will start syncing — allow a few minutes for the first download before troubleshooting.
Sending not working?
Check that Require sign-in is enabled on the outgoing server, and that the username and password are entered there too — the outgoing server needs its own copy of your login details.
Didn't work, or not sure?
No worries — that's what we're here for. Tell us what step you got up to and what you saw, and we'll sort it with you.